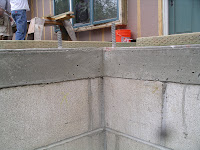


 The slab that was poured five days ago is now cured enough for us to work on it. It sits on top of the retaining wall and ties together the garage and the house. The top of the slab is exactly the same elevation as the slab of the existing house, so there will be no bumps or ledges between the old floor and the new.
Our first task was to install the sill plates (pressure-treated 2x4's). They are drilled to fit over the anchor bolts that are anchored in the concrete. Then they are fastened down with 5/8 inch nuts that are tightened with an impact wrench.
While that was being done, Al started measuring and marking all the 2x4's and 4x4's that will make up the framing. Al's markings show where each piece goes so there is no confusion once the nailing starts. John stripped the siding off the front of the house in preparation for the later removal of that wall, installation of new beams, and construction of the new living room wall.
The garage is going to be extra tall to include the storage loft that we want. From the current base of the garage, the walls are almost 12 ft. high. They won't be that high when it is finished because the concrete floor will be about 14 inches higher than the present dirt floor. However, the concrete floor won't be poured until after the framing is done. So for now, scaffolding is needed to allow the guys to get up to the top plate of the walls. By the end of the day Mark, Al and John had framed the north and south side walls of the garage. Now the real size and shape of the project are starting to become visible.


Wow, how exciting! You are finally starting to catch up to us a bit now that you have some framing up!
ReplyDeleteHow do you deal with increases in costs?
ReplyDelete