Thursday, June 30, 2011
Step 25 - More Trellis Work and Painting
The entry trellis is essentially finished. Now we have 4 other trellises to build. This begins with more lumber delivery from Dixieline. Unlike the entry trellis, these other 4 trellises are going to be supported by arched corbels that will come out from the wall. Mark cut the arched part of the corbels some time ago and now each one being put together with a 4x4 and a 4x6 to create a solid brace for the trellis.
There are 7 corbels and each piece requires a lot of work. The straight pieces have to be notched. The corners of everything are rounded with a router. Then the pieces are sanded. I've done a bunch of sanding but John Etchells has been doing most of it lately. The ends of the wood that will be hidden are painted before assembly in order to prevent moisture from entering the wood. The three pieces that form each corbel are glued and screwed together.
Where a corbel is attached to the wall there is a 4x4 in the framing to give them lots of support. A steel L-bracket gives it support from the top. Moisture barrier membrane goes between the corbel and the wall. Finally, the unit is securely bolted in place. The whole assembly must be extremely strong because several hundred pounds of wood are going to rest on top of it.
Mike Gregg is our painter. On the trellises, rafter tails, and starter boards we are using Behr solid stain in Forest green. The stain protects the wood very well while allowing some grain to show through. So far he has painted the entry trellis, the corbels for the other trellises and the fascia all around the house. There is lots more painting to come.
Step 24 - Electrical
It's time to start getting the wiring put in. Les Wanamaker is our electrician. Our house is old and has a lot of things wrong with it, one of which is the old wiring. It's a mess. So Les is going to get it straightened out as much as possible, starting with a new panel. Right now we have a line coming from the pole at the street to the middle part of the house. We're changing that to be underground, going from the pole to the northeast corner of the garage. Our plan is to get the TV cable and phone line underground too so we won't have any overhead lines coming to the house.
In the photos Les is working primarily in the garage and office. Since the new panel is on the garage, all lines to the rest of the house have to run through the garage to get to the proper rooms. Mark and his crew built a "chase", which is basically a box made of 2x4's and drywall to carry the wiring. If it's necessary later to get into the chase to work on something, we just have to open up the chase rather than cutting into a whole wall.
The mass of wires is totally confusing to me. Les has each wire labeled so that when he connects them to the panel we can label the breakers as to what they control.
Step 26 - Going on Vacation
It's probably not a good idea to take a vacation while you're in the middle of a remodel, but this is our opportunity to visit our son Kelsey and daughter-in-law Michelle and granddaughter Ada. So I won't have any blog posts for a couple of weeks and I'll miss a lot of the action that is going to take place. On the other hand, maybe it is a good idea to be gone for awhile.
While we're gone Mark and the crew will work on the living room. There is a decorative beam that goes into the ceiling and a bunch of electrical work needs to be done. Mark is building a special window for the garage. On the exterior, the trellises can be finished, the siding can start going up, and everything can get painted.
Steve Schwier has been doing a lot of plumbing lately. He is giving us new gas lines throughout the house, and the cold water lines still need to be figured out. I don't have a lot of pictures of his work, so I'll put some in here.
The bottom picture shows the house as of today. It will be very interesting to see how it looks in 2 weeks.
Wednesday, June 29, 2011
Step 22 - Roofing, part 1
This step is different from the roofing details that I have described previously. This step involves putting on the roof covering that will protect everything from the weather. Construction people call this "drying in" the structure.
Brown Roofing is doing the job for us. It is a bit trickier than an ordinary roof. The garage is pretty straightforward because it is all new. There is a skylight in it but that is no big deal. However, the rest of the roof involves attaching new plywood roof to old roof boards. There are also multiple roof planes. The tinted skylight is over the office area. Notice the number of different roof planes. Just below the skylight is something called a "cricket". Its purpose is to tie together 3 or more roof planes. In addition to that we have some flat roof sections over the entryway and part of the office.
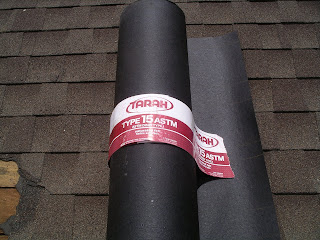
Andy and Steve Brown installed the first layers of material. The gabled roofs get a layer of 15 lb. roofing paper that is nailed down to the plywood. The flat roof areas get an updated version of a "torch down" roof. This used to be done with a torch that heated the tar causing it to stick to the wood, but that procedure is dangerous for obvious reasons. It's also really smelly. So Brown Roofing is using a new adhesive material that is applied at ambient temperatures. It sticks just as well and doesn't stink.
Andy and Steve are going to stop at this point to allow the painter to work. Then they will come back after the painter is done to finish applying the roofing material.
Saturday, June 25, 2011
Step 21 - Windows
We bought Marvin windows from Bob Lipsey at Suncoast Window and Door in Carlsbad. The windows are well made, have a great craftsman look, and they're exactly what we wanted.
They are casement style, clad with anodized aluminum on the outside to stand up to the salty air of our neighborhood. Instead of crank mechanisms, you just unlatch it, swing it outwards and lock it in place where you want it. Very nice. They have special screens on wood frames that swing inwards when you want to open or close a window or for cleaning.
Mark and his crew got them all installed in just a couple of hours, so there isn't a whole lot more to say about the windows.
Friday, June 24, 2011
Step 20 - Entryway Trellis, Part 2
After the 8x10 beam was put up and the four 6x8's were laid on top of that, the trellis now gets two layers of 4x4's. The first set are long ones that run parallel with the 8x10 beam. They are the three pairs shown in the photos. The second set are shorter and run parallel to the 6x8's. Not all of the second set have been put on in these photos. When they are all in they will go all the way out to the end of the trellis.
The part of the trellis closest to the front door is covered by a small area of roof for weather protection. This roof is only 8 ft. x 12 ft. but it was very complex to build. First, a layer of decking was put on top of the 4x4's. The decking is 2x6 tongue and groove spruce where it will be visible from underneath, and plain 2x6 Douglas Fir where it will be covered up.
It's tricky getting a small, flat roof like this to drain properly, so Pat Sheehy gave it a special design. A tapered ridge board runs diagonally across the decking, and tapered framing was added all around to fill it in. Then plywood was nailed over the whole thing. The result is a roof that will shed water in two different directions. All these layers of trellis and roof had to fit into a tight space that also contains the roof coming off the garage and its exposed rafter tails. It was quite a bit of work for Mark Stanfield and his crew, and they did a great job of it.
There is still more to be done on the trellis. It will need a hot mop roof (more on that later.) The painter, Mike Glenn, will be coming to stain all the exposed wood. We already stained some of it because there are areas that would be difficult or impossible for Mike to reach after it has all been put together. The final step for the trellis will be putting a special copper adhesive tape over the tops of all the trellis members. This will prevent water from getting into the wood and rotting it.
Subscribe to:
Posts (Atom)